Tutorial 2: Deploying to GitHub Pages using Circle
In this tutorial, we’ll deploy our website that we started in Tutorial 1 to GitHub Pages using CircleCI. By the end of this tutorial, you’ll have:
- Your source code in the
sourcebranch. - CircleCI building your website’s generated files from
sourcebranch. - CircleCI automatically commiting your generated files into
master. - GitHub hosting the files in
master.
Configuring GitHub
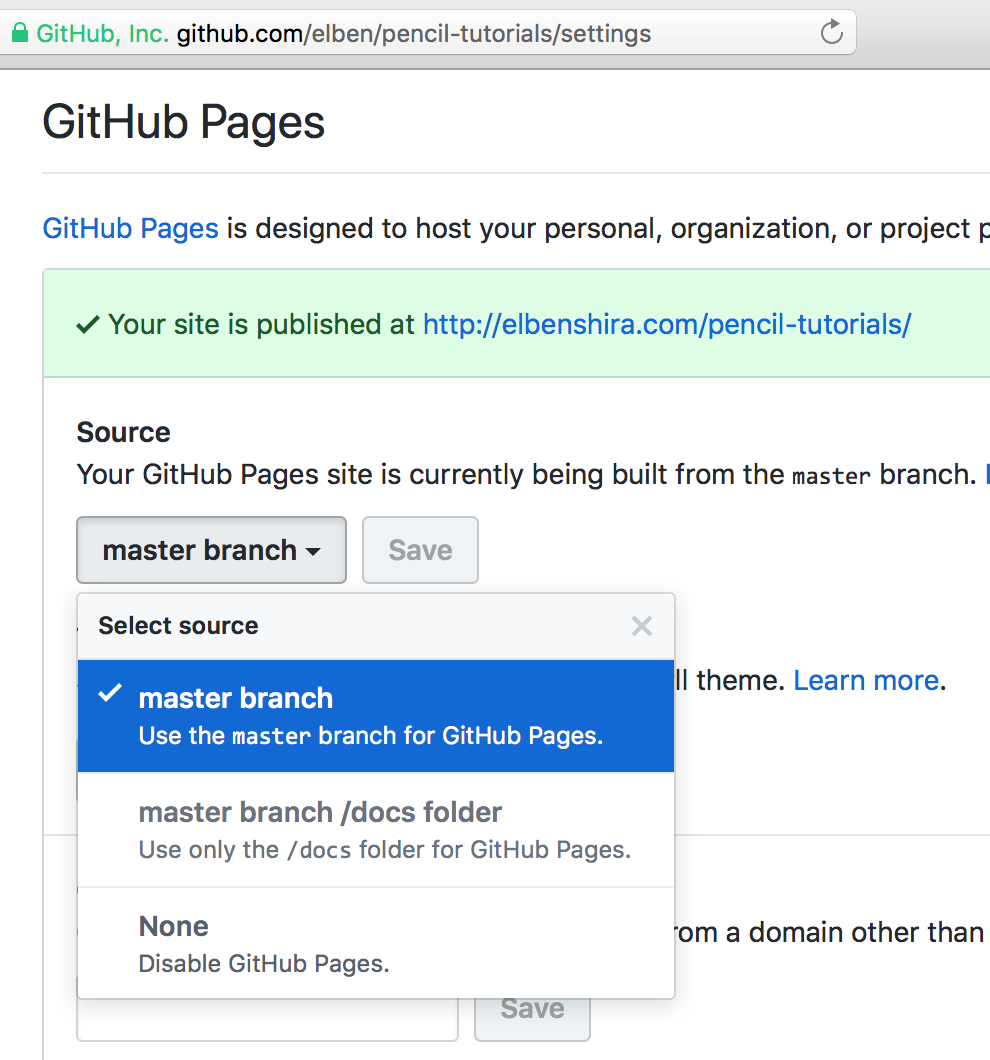
In your GitHub repository’s settings page (Settings -> Options -> GitHub Pages), set the “Source” branch to master for GitHub Pages. This tells GitHub that we’ll want to deploy whatever is in master as a static website to http://myusername.github.io/my-website.
master branchNow that we’re using the master branch for our generated files, we need to move our code into a different branch (e.g. source):
git checkout -b source
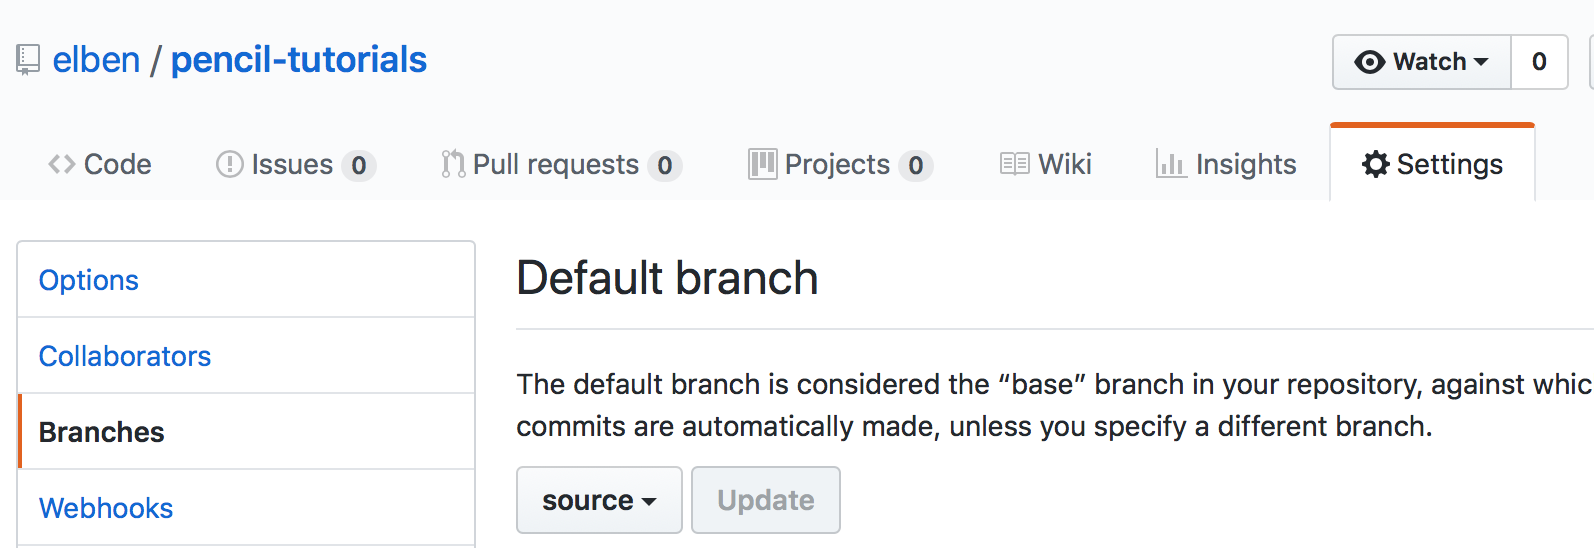
git push originOur build and deploy scripts will automatically generate commits to master, so you should no longer use that. You’ll want to set source as the default branch in the GitHub repository settings (Settings -> Branches -> Default branch).
sourceMakefile
Let’s generate a Makefile using the script provided by Pencil:
Check out the generated Makefile to make sure that your GitHub username, repo, and project name looks correct.
With this Makefile, you can now just type make to build all your dependencies and generate your website. We’ll also use this in the CircleCI build.
CircleCI Configuration
We’ll also setup a CircleCI to automatically build and deploy our website whenever we push our source.
In your project’s directory, generate the required CircleCI configuration files using this script:
bash <(curl -fsSL https://raw.githubusercontent.com/elben/pencil/master/bin/gen-stack-circle-config)The CircleCI build plan generated in .circleci/config.yml folder will:
- Build the
sourcebranch and other branches that is notmaster. This generates your website’s static content. - Deploy the
masterbranch. It “deploys” your website by taking the static content generated and commiting those files as a git commit in themasterbranch. So yoursourcebranch contains Haskell code, and yourmasterbranch contains the generated static content. - Once a commit is generated in
master, this triggers GitHub Pages to deploy the static content on their webservers. - There is also a
.circleci/noop.ymlconfig that we inject into themasterbranch so that CircleCI ignores that branch.
You can read more about the CircleCI configuration here.
Putting it all together
With that, lets commit and push the files to the remote source branch:
git add .circleci Makefile
git commit -m "Add Makefile and .circleci files"
git push
Now we need to set up our project in CircleCI:
- Go to the CircleCI dashboard.
- Click on “Add Projects”.
- Add your website repo by clicking “Set Up Project”.
- In the project setup page, just click on “Start building”, since we’ve already created our
.circleci/config.ymlfile.
At this point, Circle should start building your website. Wait for the build to finish, and Circle should automatically push your generated website to the master branch.
If CircleCI fails to push to GitHub, you may need to set up your SSH keys to have write access to the GitHub repo. Follow the instructions in your project’s “Checkout SSH keys” settings page to set up either a user key or a deploy key with write access (circleci.com/gh/your-username/your-project/edit#checkout).
Once the build is done (it may take a while at first as it’s downloading and caching all the Haskell dependencies), GitHub will deploy your website to GitHub will then deploy your website to myusername.github.io/my-website
And that’s it! You’ve successfully set up continuous integration. Any new pushes to source will now kick-off a build and deploy.